This guide explains how to install and configure the latest TVClub plugin for Dune HD media players. The plugin has been rewritten from scratch; use version 1.1.3. This release fixes plugin loading, improves startup time and catch-up archive handling, and includes minor fixes.
Download the TVClub plugin for Dune HD 1.1.3.
Requirements
- a Dune HD media player with internet access;
- a USB drive supported by the player; FAT is required for recording;
- your TVClub login and password;
- the TVClub plugin 1.1.3 ZIP archive.
Do not unpack the archive: Dune HD installs the plugin directly from the ZIP file.
Installing the Dune HD plugin
- Download the plugin ZIP archive to a USB drive: Download the TVClub plugin for Dune HD 1.1.3.
- Insert the USB drive into the media player and turn the device on.
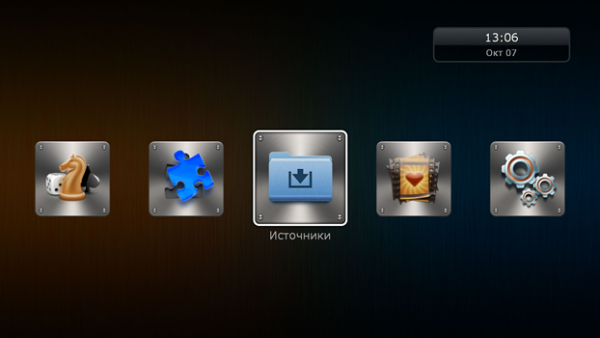
- In the main menu, select Sources.
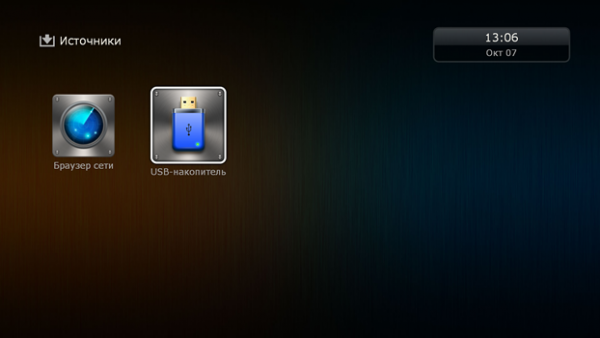
- Select the USB drive.
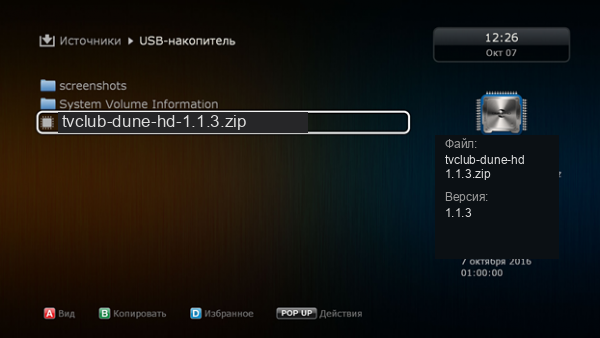
- Find the plugin ZIP file and press Enter on the remote.
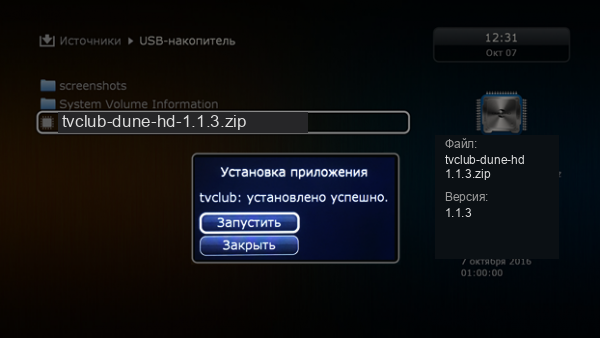
- In the installation dialog, select "Start".
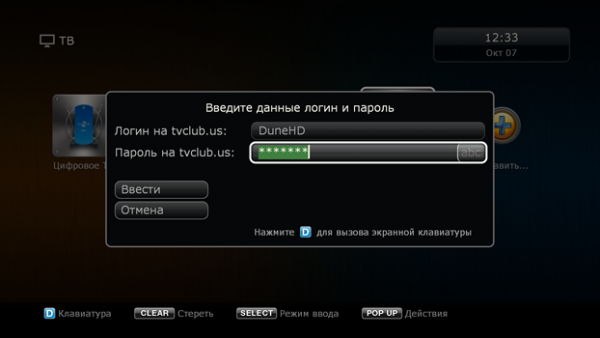
- Enter your TVClub login and password, then select "Enter".
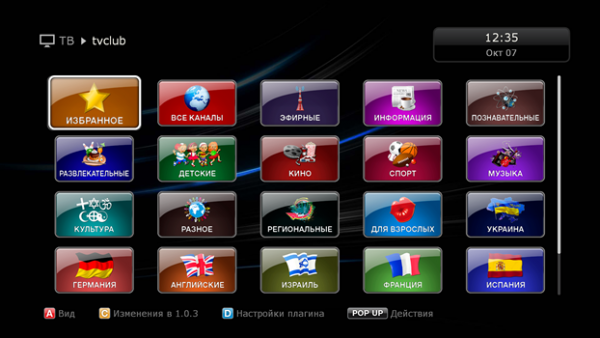
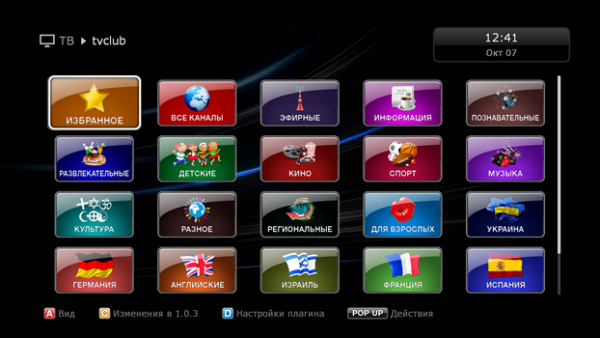
After sign-in, the channel category list opens.
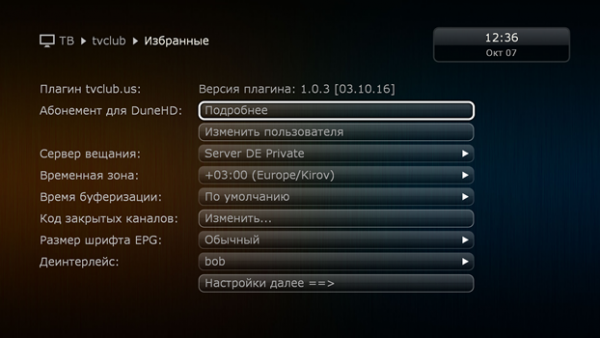
Plugin settings
In settings, you can choose the streaming server, time zone, buffering time and other playback options.
- In the category list, press the blue D button on the remote. The plugin settings menu opens.
- To open the remaining options, select "Next settings".
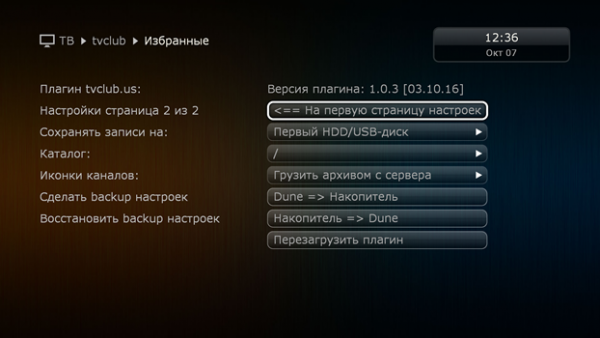
To return to the first settings page, select "Back to the first settings page".
Watching channels, EPG and catch-up
Watching TV channels
- Choose a category from the category list and press Enter.
- Choose a channel from the channel list and press Enter.
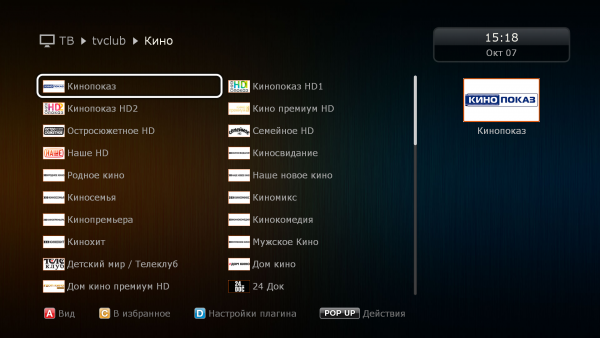
Playback starts after you select a channel.
Viewing the EPG
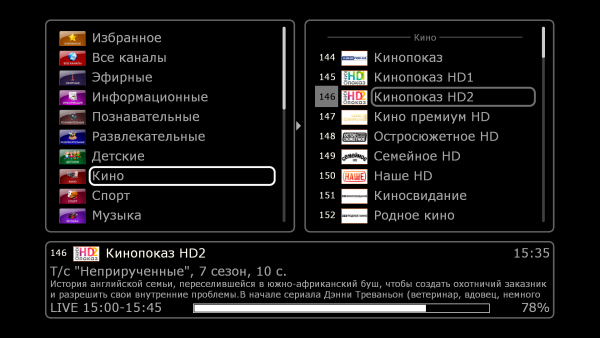
- While watching a channel, press Enter. The category and channel lists open.
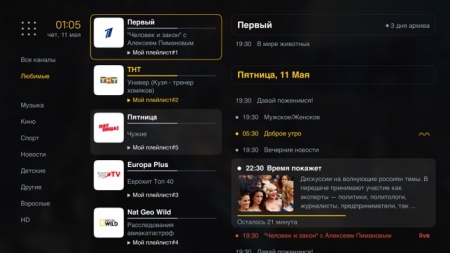
- Choose a channel and press the Right arrow button. The EPG for the selected channel appears on the right.
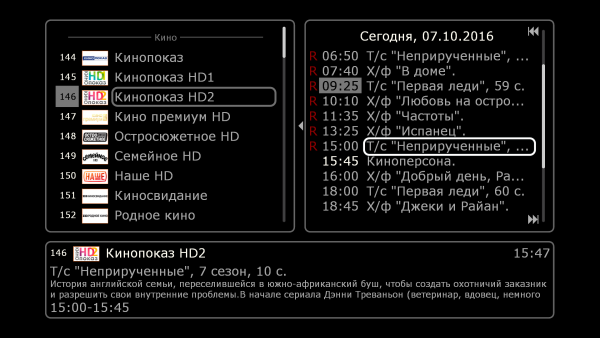
Use the Up and Down arrow buttons on the remote to move through the EPG.
Watching catch-up programmes
- Open the EPG for the required channel.
- Programmes available in the archive are marked with R. Select a programme and press Enter.
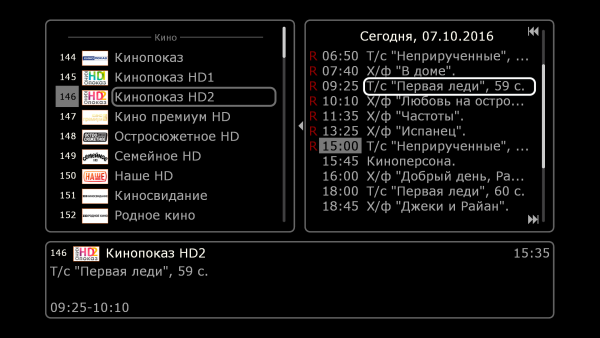
The archived recording starts after selection.
Recording live TV and watching recordings
Recording requires a connected FAT-formatted USB drive. Make sure there is enough free space on it.
Starting and stopping live recording
- In the channel list, select a channel and press POP UP on the remote.
- In the dialog, select "Background channel recording".
- To stop recording, open the channel menu again and select "Stop recording".
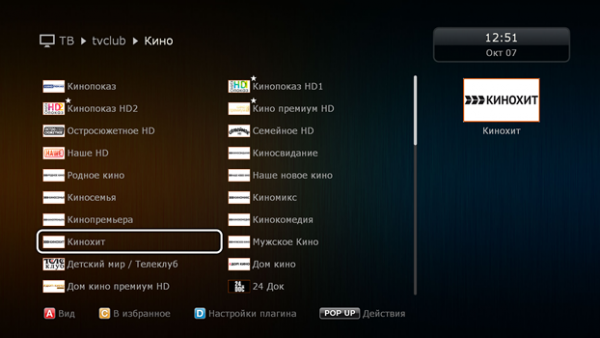
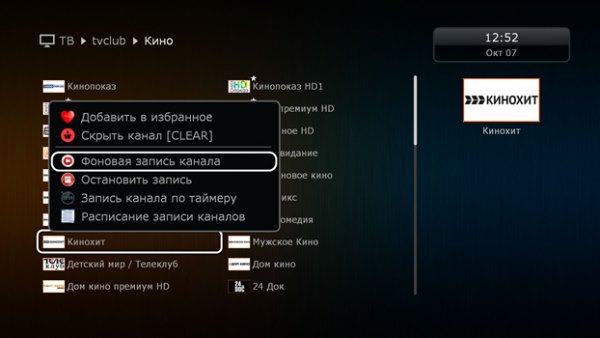
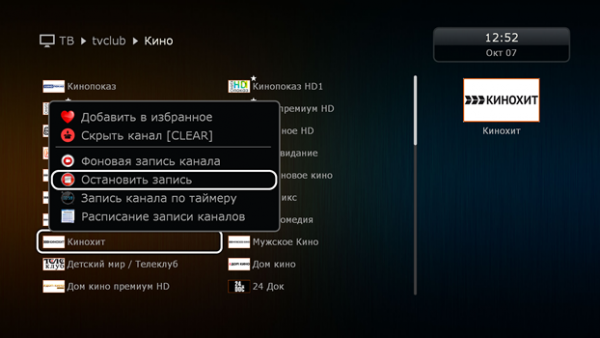
Recording continues until you stop it or until the USB drive runs out of free space.
Timer recording
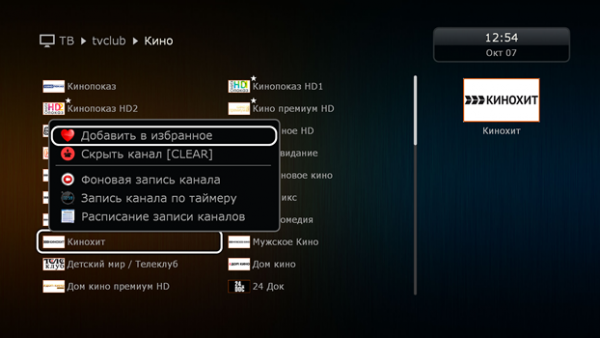
- Select a channel and press POP UP.
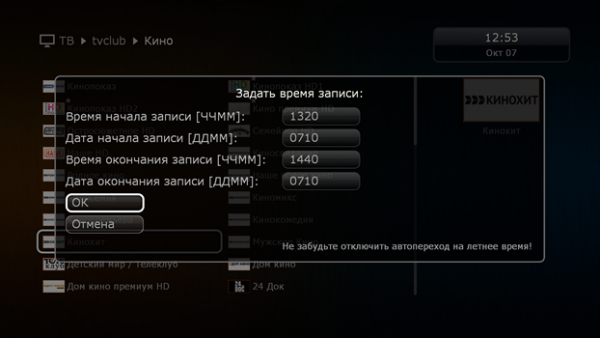
- Select "Channel recording by timer".
- In the "Set recording time" dialog, set the time, start date and end date, then select "OK".
Deleting a timer recording
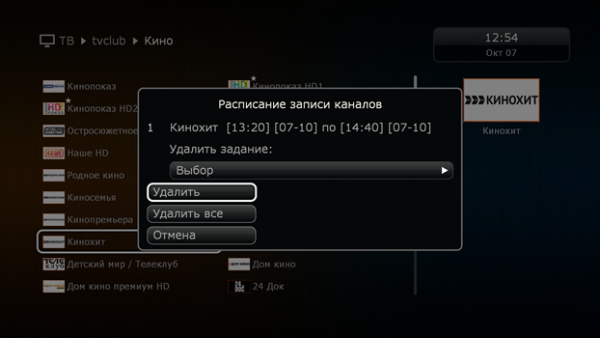
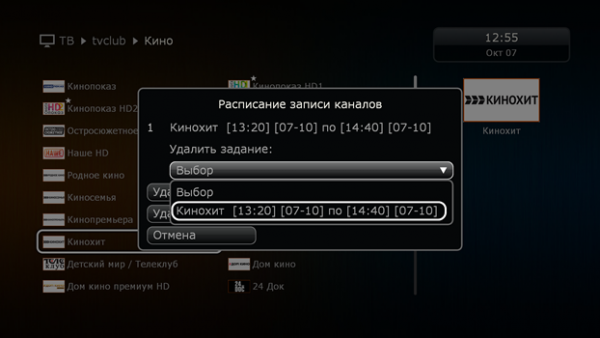
- In the channel menu, select the recording schedule.
- In the "Delete task" row, press Enter and choose the recording you want to delete.
- After selecting the task, press "Delete". To remove all tasks, use "Delete all".
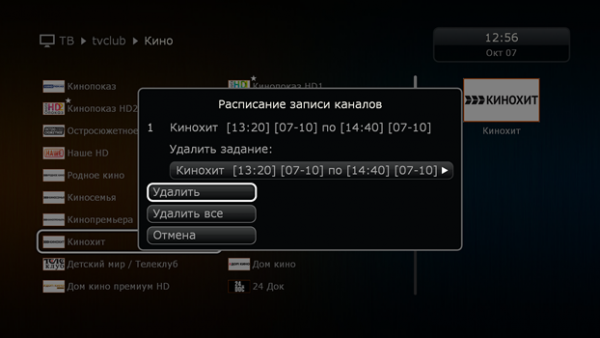
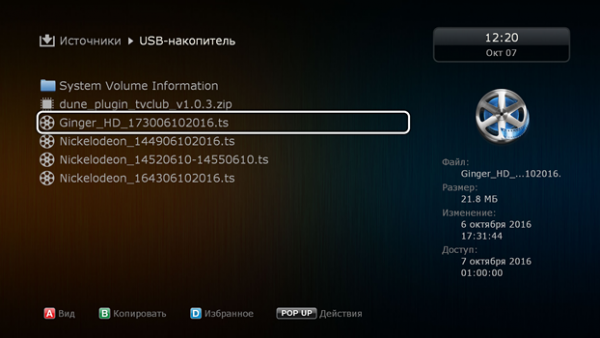
Watching recordings
- Open Sources from the Dune HD main menu.
- Select the USB drive.
- Find the required recording on the drive and press Enter.
Adding channels to Favorites
- Open the channel list.
- Select a channel and press the blue D button on the remote. This button adds the channel to Favorites or removes it.
- Return to the category list and select "Favorites".
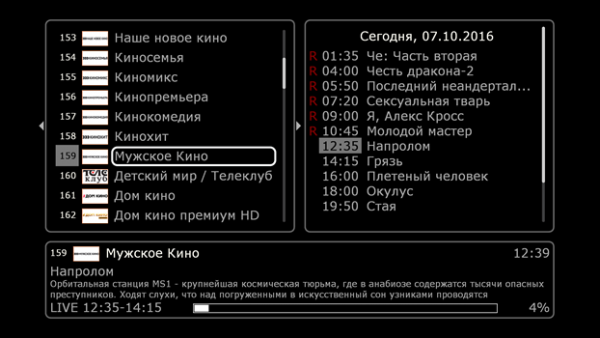
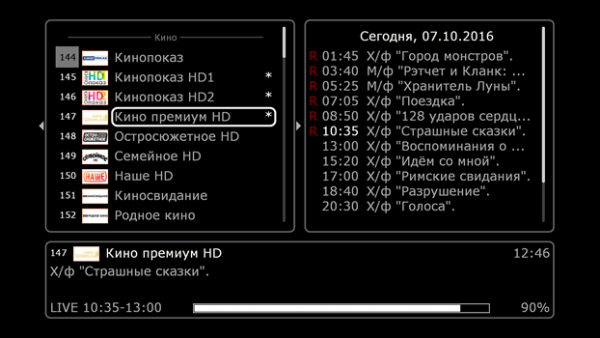
Favorite channels are marked with a star.
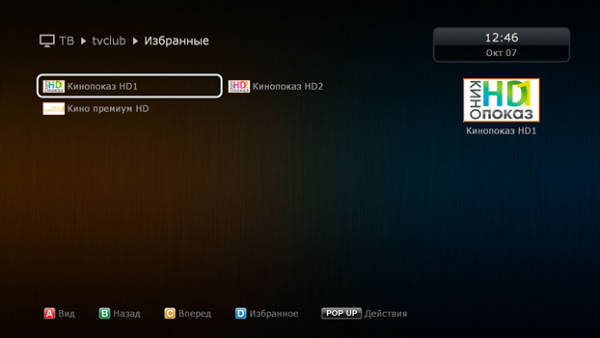
The category shows channels you have added to Favorites.
Additional features
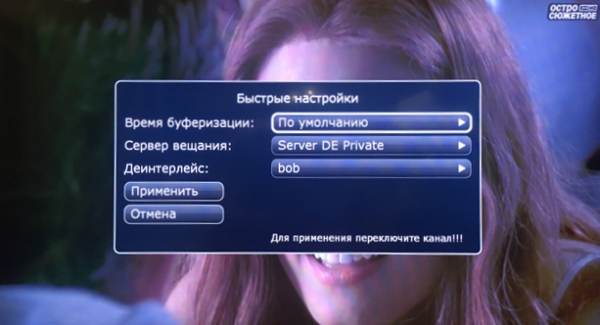
Quick settings
While watching a channel, press Setup on the remote. The Quick settings menu opens, where you can change the streaming server and buffering time.
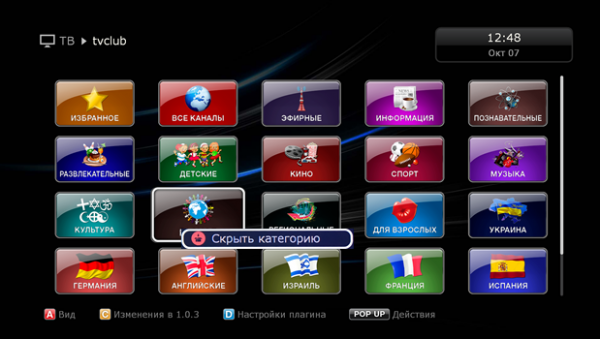
Hiding a channel category
In the category list, select the category you want to hide and press POP UP. Confirm with Enter or cancel with Return.
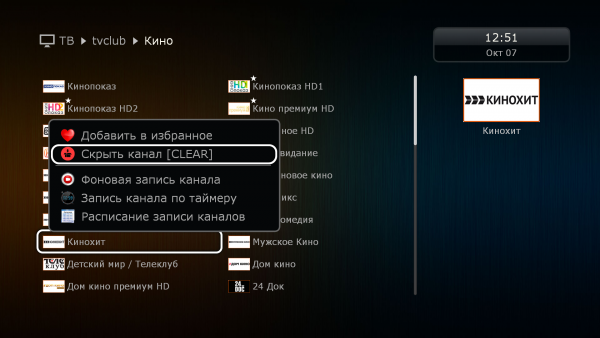
Hiding a channel
In the channel list, select a channel, press POP UP and choose "Hide channel [Clear]".
Right-to-left programme guide
Newer Dune HD models support right-to-left EPG display for Hebrew and other languages with similar writing direction.
Older media player models may not support this mode.