STB Emulator lets an Android device work like a virtual IPTV set-top box for TVClub. This guide covers installation, portal setup, choosing the streaming server and channel package, watching TV, using EPG, catch-up and the Favorites list.
Installing STB Emulator
System requirements: Android 4.0 or newer and about 12 MB of free space. Before installing, make sure the device is connected to the internet.
Installing from an APK file
- Download the application APK file. If you use an external source, such as the app page on 4PDA, check that the version and file source are still trustworthy before installing.
- Allow installation from unknown sources on the Android device.

Allowing installation from unknown sources. - Run the downloaded APK file and finish installing the app.
Installing through Google Play
The app can also be found through Google Play search. The QR code and search lead to the store listing; choose the version deliberately, taking into account the differences between the free and paid editions.

- Open Google Play on the Android device.

Google Play home screen. - Search for “STB Emulator” or “IPTV set-top box emulator”.

Searching for the app in Google Play. - Select the appropriate app from the search results.

App search results in Google Play. - Open the app listing, check the description and tap “Install”.

App description before installation. - Review the app permissions and confirm installation.

App permissions dialog. - Wait for the installation to finish.

App installation progress. - Tap “Open” to launch the app.

Open button after installation. - After launch, the portal start screen opens.

Portal start screen after launching the app.
Setting up the TVClub portal
To use TVClub in the emulator, create a profile, enter the portal URL, choose the MAG250 set-top box type, enable Device ID sending and reload the portal.
- Tap the device screen to open the emulator menu.

Emulator menu after tapping the screen. - Tap the menu button in the upper-left corner.

Menu button in the emulator interface. - Open the emulator settings menu.

Emulator settings menu. - Select “Edit profile data”.

Edit profile data item. - The “Settings” screen opens.

Profile settings screen. - Select “Profile name”.

Profile name field. - Enter any profile name and confirm with “Yes”.

Changing the profile name. - Open “Portal settings”.

Opening portal settings. - Select “Portal URL”.

Portal URL item. - Remove the old address and enter http://iptv.tvclub.us. If an older device has trouble loading the portal, try http://old.tvclub.us. Confirm with “Yes”.

Entering the TVClub portal URL. - In “Settings”, open “STB configuration”.

STB configuration section. - Select “Set-top box type”.

Set-top box type item. - In the set-top box type list, select MAG250.

Selecting MAG250 as the set-top box type. - Return to “STB configuration” and select “Device ID”.

Device ID item. - Enable “Use device ID based on MAC address” and “Send Device ID”.

Device ID setup. - Exit settings. The new parameters are saved automatically. Then open the emulator menu and select “Reload portal”.

Reloading the portal after setup. - After reload, enter your TVClub login and password and tap “OK”. If Multiroom is enabled, you can use the additional-device login from your account.

TVClub login and password dialog. - Wait for the portal to load.

TVClub portal loading. - After loading, the TVClub client portal opens.

TVClub client portal in the emulator.
Choosing the streaming server and channel package
The streaming server and channel package are selected in the client portal account area. Use the on-screen left, right, up, down and OK buttons.
- In the main menu, open “Account” and select “Service management”.

Opening service management. - Tap the “OK” button on the device screen.

Confirming the transition to service management. - In “Service management”, choose a server with the up and down buttons. Before choosing, you can test the connection speed at tvclub.cc/test.

Choosing a streaming server. - Tap the green “Connect” button.

Connecting the selected server. - Enter the password and confirm with “OK”. The default PIN is 0000.

Password dialog for connecting a server.
For servers, the red button disconnects the selected server and the green button connects it. The default PIN for connecting or disconnecting is 0000.
- To connect a channel package, select the package in the list.

Choosing a channel package. - Tap the green “Connect” button.

Connecting the channel package. - Enter the password and confirm with “OK”.

Password dialog for a channel package. - To view package details, select the package and tap “OK”.
Opening channel package details. - The “About package” screen opens.
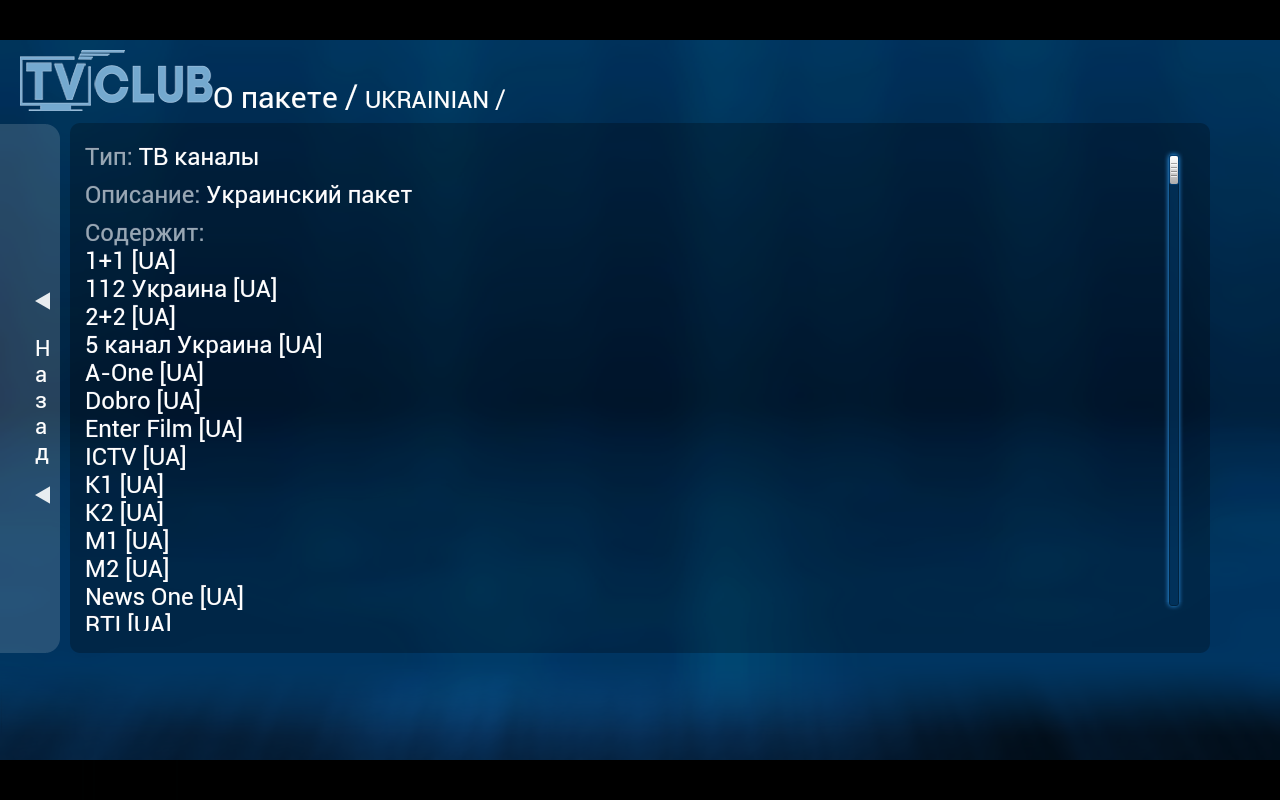
Channel package details.
Watching channels, EPG and catch-up
Watching channels
- In the main menu, select “TV”. A list of themed channel groups appears.

TV section in the main menu. - Select the required channel group and tap “OK”.

Choosing a channel group. - The selected group channel list opens.

Channel list.
Switch channels with the up/down buttons, Page Up/Page Down or numeric buttons. A preview window is shown on the right, with the selected channel schedule below it. “OK” switches between fullscreen mode and the list.
Viewing the program guide
- In the channel list, press right to open “TV guide”.

Opening TV guide from the channel list. - The selected channel program guide opens.

Selected channel program guide.
EPG programs are selected with the up/down buttons. On the left, you can choose a program day: move to the day list with the left button, select a day and tap “OK”. Press left again to return to the channel list.
Watching catch-up recordings
The icon  next to a channel means catch-up recordings are available for it.
- Open the channel list and find a channel with the archive icon.

Channels with the archive icon. - Open “TV guide” and find a program marked with a dot.

Choosing a catch-up program through TV guide. - Tap “OK” on the selected program.

Confirming the catch-up program selection. - The recording starts playing.

Playing a catch-up recording.
The buttons  seek through the recording, while the button
  pauses and resumes playback. To leave catch-up playback, press back on the device.
Additional actions are available in the channel list.

- F1 switches the channel list mode: list or list with information.
- F2 sorts channels by number, by name or shows Favorites only.
- F3 adds a channel to Favorites or removes it from Favorites.
- F4 moves a channel in the list. This function is available only in the Favorites list.
Favorites and channel order
Creating the Favorites list
- Open the channel list.

Channel list before adding channels to Favorites. - Mark the required channels with the yellow F3 button.

Selecting channels for Favorites. - The icon
 next to a channel confirms that it has been added to Favorites.
Channel added to Favorites. - Press the green F2 button to open channel list sorting.

Opening the channel sorting menu. - The sorting menu opens.

Channel sorting menu. - Select “Favorites only” with the up and down buttons.

Selecting “Favorites only”. - Tap “OK”.

Confirming Favorites-only mode. - The Favorites channel list opens.

Favorites channel list.
In the Favorites list, channels can be moved with F4. This function is available only after selecting “Favorites only”.
Moving channels in Favorites
- In the Favorites list, select the channel you want to move.

Selecting a channel to move. - Tap the blue “Move” button.

Move channel button. - The channel enters move mode and markers appear next to its name.

Channel ready to be moved. - Move the channel up or down in the list.

Moving the channel in the list. - When the channel is in the right position, press the blue button again.

Saving the new channel position. - The Favorites channel order is changed.

Changed channel order in Favorites.